
Have you ever gazed at your kitchen and thought, “This space could use a little something extra”? Maybe it’s time to consider a backsplash! A well-chosen backsplash can transform your kitchen from ordinary to extraordinary. But before you dive into selecting tiles or materials, knowing how to measure backsplash for your kitchen is essential. Whether you’re a DIY enthusiast or planning to hire a professional, accurate measurements ensure a flawless installation. Let’s embark on this journey to make your kitchen backsplash dreams a reality!
Why a Backsplash Matters in Your Kitchen
Ever wondered why some kitchens have that stunning tiled area behind the stove or sink? A backsplash isn’t just about aesthetics—it serves practical purposes too:
- Protection: Shields your walls from splashes, spills, and heat.
- Style Statement: Adds a pop of color, texture, or pattern, enhancing the overall kitchen design.
- Easy Maintenance: Makes cleaning easier compared to painted or wallpapered surfaces.
Getting Started: Tools You’ll Need
Before you begin measuring, gather these essential tools:
- Tape Measure: A sturdy, flexible one is best.
- Level: Ensures your measurements are straight.
- Pencil and Paper: For jotting down measurements and notes.
- Stud Finder: Useful if you’re installing a heavy backsplash.
- Laser Level (optional): For precise horizontal and vertical lines.

Step-by-Step Guide on How to Measure Backsplash for Your Kitchen
Step 1: Determine the Backsplash Area
Where do you want your backsplash? Typically, backsplashes extend from the countertop to the bottom of the upper cabinets. However, some prefer extending it to the ceiling or just behind the stove.
Step 2: Measure the Width and Height
- Width: Measure the horizontal length where the backsplash will be installed. This usually corresponds to the width of your countertop or the range of cabinets above.
- Height: Measure from the countertop to the bottom of the upper cabinets. If there’s no cabinetry, measure up to the desired height, such as the range hood or ceiling.
Step 3: Account for Obstacles
Take note of any fixtures like faucets, vents, or switches that might interrupt the backsplash. Measure each segment separately:
| Obstacle | Width (in inches) | Height (in inches) |
|---|---|---|
| Faucet | 2 | 4 |
| Vent | 3 | 6 |
| Light Switch | 1 | 3 |
Step 4: Calculate Total Square Footage
To determine how much material you need:
- Total Area: Multiply the width by the height for each section.
- Subtract Obstacles: Deduct the area taken up by any fixtures.
Example Calculation:
- Width: 10 feet (120 inches)
- Height: 5 feet (60 inches)
- Obstacles: Total 20 square inches
Total Area:
Total Area = 120 * 60 = 7,200 sq in
Subtract Obstacles:
Area without Obstacles = 7,200 - 20 = 7,180 sq in
Convert to sq ft:
Area in sq ft = 7,180 / 144 ≈ 49.86 sq ftStep 5: Add Extra for Cutting and Waste
It’s wise to add about 10-15% extra to account for cuts and potential mistakes.
Area with 15% Increase = 49.86 * 1.15 ≈ 57.34 sq ft
Tips for Accurate Measurements
- Double-Check: Always measure twice to avoid errors.
- Use a Level: Ensures your measurements are straight and even.
- Take Notes: Document each measurement meticulously.
- Consider Tile Patterns: Patterns like herringbone or diagonal layouts may require additional materials.
Common Mistakes to Avoid
- Ignoring Obstacles: Failing to account for fixtures can lead to insufficient material.
- Not Adding Extra: Skipping the waste margin can result in incomplete projects.
- Using Inaccurate Tools: Poor quality measuring tools can compromise precision.
Choosing the Right Backsplash Material
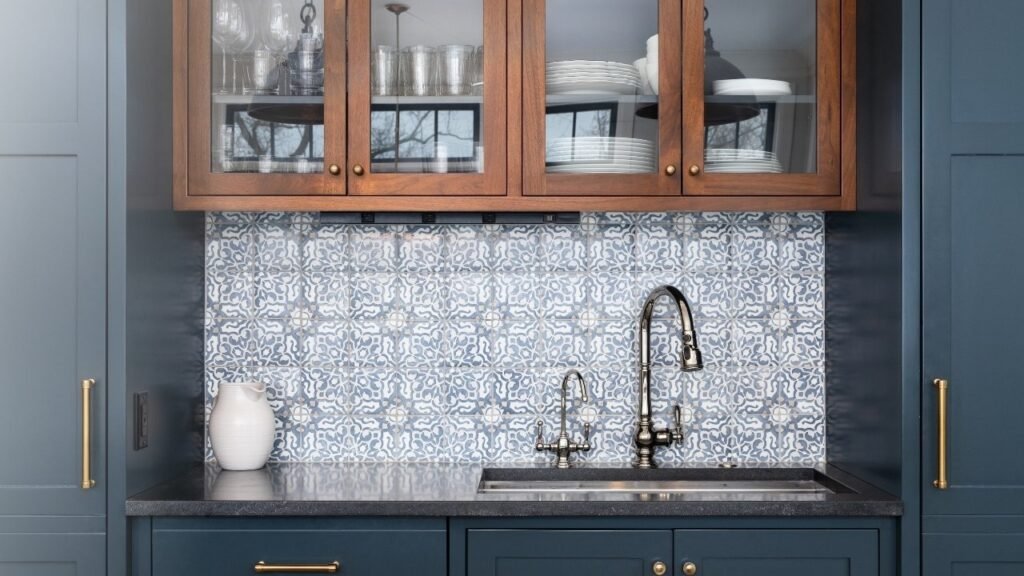
Now that you know how to measure backsplash for your kitchen, let’s explore popular materials:
| Material | Pros | Cons |
|---|---|---|
| Ceramic Tiles | Affordable, versatile, easy to install | Grout can stain, may chip |
| Glass Tiles | Sleek, easy to clean, reflective | Expensive, requires careful handling |
| Stone (e.g., Marble, Granite) | Durable, luxurious look | Heavy, requires sealing |
| Metal (Stainless Steel, Copper) | Modern, heat-resistant | Can scratch, shows fingerprints |
| Peel-and-Stick | DIY-friendly, budget option | Less durable, limited styles |
Personal Preference: Why I Love Subway Tiles
Subway tiles are a classic choice for many kitchens. Their simplicity complements various design styles, from rustic to modern. Plus, they’re relatively easy to install, making them a favorite among DIYers like me!
How to Layout Your Backsplash Design
Before installation, plan your layout:
- Dry Fit: Place tiles on the countertop and wall without adhesive to see how they fit.
- Mark Guidelines: Use a level to draw straight lines as references.
- Start Centered: Especially for patterns, starting in the center ensures symmetry.
Tools and Materials Needed for Installation
Once you’ve measured and chosen your materials, gather the following:
- Tiles or backsplash material
- Adhesive (tile mastic or thinset)
- Grout
- Notched trowel
- Tile cutter or wet saw
- Sponge and bucket
- Level and measuring tape
- Safety gear (gloves, goggles)
Installation Process Overview
Step 1: Prepare the Area
- Clean the wall surface.
- Remove any existing backsplash if necessary.
- Apply painter’s tape around the edges for protection.
Step 2: Apply Adhesive
Using a notched trowel, spread adhesive evenly on the wall.
Step 3: Place the Tiles
- Start from the bottom center.
- Press tiles firmly, ensuring they’re level.
- Use spacers for consistent grout lines.
Step 4: Cut Tiles as Needed
Measure and cut tiles to fit around obstacles and edges.
Step 5: Grouting
Once the adhesive dries, apply grout between the tiles. Wipe off excess with a sponge.
Step 6: Sealing
Seal the grout lines to protect against moisture and stains.
Maintaining Your Backsplash
A beautiful backsplash deserves proper care:
- Regular Cleaning: Wipe down with a mild cleaner.
- Seal Periodically: Especially for stone or porous materials.
- Inspect for Damage: Address chips or cracks promptly to prevent further issues.
Frequently Asked Questions (FAQs)
1. Can I install a backsplash myself, or should I hire a professional?
While many backsplashes are DIY-friendly, hiring a professional ensures precise installation, especially for intricate patterns or heavy materials.
2. How long does it take to install a backsplash?
Typically, a DIY installation can take a weekend, depending on the complexity. Professional installations might take a day or two.
3. What’s the best backsplash height?
Most backsplashes range from 4 to 6 inches above the countertop. However, some extend higher, especially in kitchens with high ceilings or unique designs.
4. How do I choose the right backsplash material?
Consider factors like durability, maintenance, style, and budget. For instance, ceramic tiles are great for affordability and variety, while glass tiles offer a sleek look.
5. Do I need to waterproof my backsplash?
Yes, especially behind sinks and stoves. Waterproofing prevents moisture damage and prolongs the lifespan of your backsplash.
Final Thoughts: Transform Your Kitchen with Confidence
Embarking on a backsplash project might seem daunting, but with the right knowledge on how to measure backsplash for your kitchen, you’re well on your way to achieving a stunning and functional space. Remember, accurate measurements are the foundation of a successful installation. Don’t rush the process—take your time, double-check your numbers, and choose materials that reflect your personal style.
So, are you ready to give your kitchen that fresh new look? Imagine cooking amidst beautiful tiles that not only protect your walls but also inspire your culinary creations. Happy remodeling!

- OSIPOTO 2LB Bread Maker Troubleshooting - September 14, 2026
- Turbochef Troubleshooting - September 14, 2026
- OSIPOTO Bread Maker Machine Review: Honest Take 2026 - September 13, 2026

