


Are you craving fresh, warm bread but need to avoid gluten? You might be wondering if your bread maker can handle gluten-free recipes.
The good news is, yes—you can make delicious gluten-free bread right at home using your bread machine. But there are some key tips and tricks you need to know to get the best results. Keep reading, and you’ll discover how to turn your bread maker into your new gluten-free baking hero.
Choosing The Right Bread Maker
Choosing the right bread maker is key to baking good gluten-free bread. Not all bread machines work well with gluten-free recipes. Some models have special settings to help gluten-free dough rise and bake perfectly. Understanding these features helps you pick the best machine for your needs.
Features For Gluten-free Baking
Look for a bread maker with a dedicated gluten-free setting. This setting adjusts kneading and baking times for gluten-free dough. A good machine should mix the dough gently to avoid breaking it. A non-stick bread pan helps remove bread easily without damage. A clear display and easy controls make baking simple. Some machines offer rapid bake options to save time. A timer function lets you start baking anytime you want.
Popular Models For Gluten-free Bread
Many bread makers support gluten-free baking well. Zojirushi is popular for its precise settings and reliable results. Hamilton Beach offers affordable models with gluten-free cycles. Cuisinart bread makers have simple controls and good gluten-free programs. Oster machines combine value and useful features for gluten-free recipes. Read reviews to see how each model performs with gluten-free dough. Choose a machine that fits your budget and baking goals.
Essential Ingredients For Gluten-free Bread
Making gluten-free bread in a bread maker requires the right ingredients. These ingredients help create bread with good texture and taste. Gluten-free bread needs special flours and other components to replace gluten. Understanding these essentials will improve your bread-making results.
Gluten-free Flours To Use
Gluten-free bread needs flours that do not contain gluten. Common choices include rice flour, almond flour, and sorghum flour. These flours give the bread structure and flavor. Using a mix of flours often works best. It balances taste and texture. Avoid using only one type of flour for bread.
Binders And Additives
Binders help hold gluten-free bread together. They replace the sticky quality of gluten. Common binders are xanthan gum and guar gum. These ingredients improve bread’s texture and elasticity. Some recipes use eggs or flaxseed as natural binders. Binders prevent the bread from crumbling.
Yeast And Leavening Agents
Yeast helps gluten-free bread rise and become fluffy. Active dry yeast or instant yeast works well. Some recipes add baking powder or baking soda. These leavening agents increase the bread’s volume. Proper yeast activation is important for good rise. Fresh yeast and the right temperature matter most.
Adjusting Recipes For Bread Makers
Adjusting recipes for bread makers is key to baking great gluten-free bread. Bread machines work differently than hand baking. Recipes need small changes to fit the machine’s process and timing. This helps the dough rise and bake evenly.
Measuring Ingredients Accurately
Use a kitchen scale for precise measurements. Gluten-free flours vary in weight from regular flours. Even small errors affect dough texture and rise. Spoon flour lightly into the measuring cup, then level it off. Avoid packing flour down, which adds too much.
Liquid Ratios And Consistency
Gluten-free dough needs extra moisture to stay soft. Measure liquids carefully to keep the dough sticky but not wet. Too little liquid makes dry, crumbly bread. Too much creates a gummy texture. Adjust water, milk, or broth slowly until the dough feels right.
Sweeteners And Fats
Sweeteners like honey or sugar feed yeast and improve browning. Use the same amount as in standard recipes. Fats such as oil or butter add softness and flavor. They help keep gluten-free bread fresh longer. Measure fats accurately to avoid greasy or dense bread.
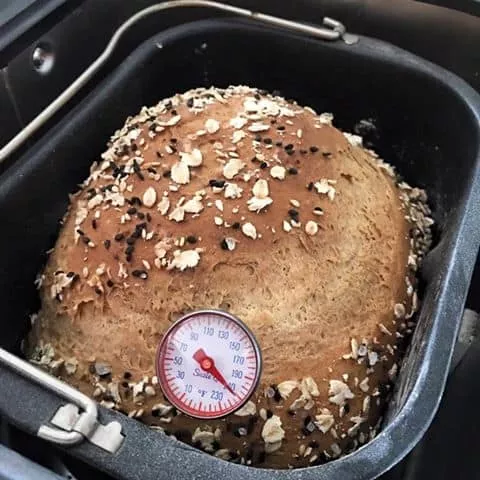
Step-by-step Baking Process
Baking gluten-free bread in a bread maker is simple with the right steps. Follow each part carefully for the best results. This step-by-step guide helps you make soft, tasty gluten-free bread at home.
Preparing The Bread Maker
Start by cleaning the bread pan and paddle. Make sure they are dry before use. Place the bread pan inside the machine securely. Check your bread maker’s manual for any special instructions. Set the machine on a flat surface to avoid shaking. This helps the ingredients mix evenly.
Mixing And Kneading Tips
Measure gluten-free flour and other ingredients carefully. Use fresh yeast for better rising. Add liquids first, then dry ingredients on top. This order helps prevent clumps. Avoid opening the lid during kneading to keep the temperature steady. Gluten-free dough is sticky; do not add extra flour. Let the machine handle the kneading time fully.
Choosing The Right Baking Cycle
Select the gluten-free or rapid baking cycle on your bread maker. These cycles avoid over-kneading and long rising times. Use the crust setting you prefer: light, medium, or dark. If your machine lacks a gluten-free cycle, choose the cake or quick bread option. This gives the best texture and rise for gluten-free bread.
Troubleshooting Common Issues
Troubleshooting common issues with gluten-free bread in a bread maker helps improve your baking results. These problems often happen because gluten-free dough behaves differently than regular dough. Knowing how to fix them saves time and reduces waste.
Dense Or Crumbly Texture
Dense bread often means the dough did not rise enough. Too much flour or too little liquid can cause this problem. Use the exact measurements in your recipe. Crumbly bread lacks moisture or binding agents. Adding xanthan gum or an extra egg can help hold the bread together.
Bread Not Rising Properly
Gluten-free dough needs the right temperature to rise. Cold ingredients or a cold room slow down yeast activity. Warm the liquid before adding it to the mix. Also, check the yeast’s expiration date. Old yeast will not produce enough gas for rising.
Crust Problems
Too thick or hard crust can form if the baking time is too long. Reduce the baking time or lower the temperature slightly. A pale crust means the bread needs more heat or sugar in the recipe. Sugar helps with browning and crust color. Cover the bread with foil if the crust browns too fast.
Enhancing Flavor And Texture
Making gluten-free bread in a bread maker can sometimes result in bread that tastes plain or feels dense. Enhancing the flavor and texture helps make your bread more enjoyable. Small changes can create a big difference in every bite. You can add ingredients that bring crunch, aroma, and a slight sweetness to your bread. These additions improve the overall eating experience without extra effort.
Adding Seeds And Nuts
Seeds and nuts add a pleasant crunch and nutty taste. Sunflower seeds, pumpkin seeds, and walnuts work well. They also boost nutrition with healthy fats and protein. Sprinkle them into the dough or on top before baking. This gives the bread a nice texture and look. Be sure to chop nuts into small pieces to avoid heaviness.
Herbs And Spices
Fresh or dried herbs make gluten-free bread smell and taste fresh. Rosemary, thyme, and oregano are great choices. Spices like cinnamon or nutmeg add warmth and sweetness. Mix herbs or spices directly into the dough. This adds flavor without extra calories or sugar. Experiment with small amounts to find your favorite blend.
Using Natural Sweeteners
Natural sweeteners improve taste and help the bread brown nicely. Honey, maple syrup, or agave syrup are good options. They add mild sweetness and keep the bread moist. Use small amounts to avoid too much sugar. Adding natural sweeteners makes gluten-free bread more appealing to kids and adults alike.
Storage And Shelf Life
Gluten-free bread needs careful storage to keep it fresh and tasty. It dries out faster than regular bread. Proper storage helps keep moisture and flavor inside. It also slows mold growth and staling. Understanding how to store your bread extends its shelf life. This saves money and reduces waste.
Best Ways To Store Gluten-free Bread
Store gluten-free bread in a cool, dry place. Use an airtight container or a resealable plastic bag. Avoid leaving it out in the open air. Wrapping bread in foil or plastic wrap works well too. Keep bread away from heat and sunlight. These can dry out the bread quickly. For short-term storage, keep bread at room temperature. Eat it within two to three days for the best taste.
Freezing And Reheating Tips
Freezing is the best way to keep gluten-free bread longer. Slice the bread before freezing for easy use. Wrap slices tightly in plastic wrap or foil. Place them in a freezer bag to prevent freezer burn. To thaw, leave slices at room temperature for 30 minutes. Warm them in a toaster or oven for a fresh taste. Avoid microwaving too long. It can make bread chewy or tough.

Frequently Asked Questions
Can Gluten-free Bread Be Made In Any Bread Maker?
Yes, many bread makers have a gluten-free setting. This setting adjusts mixing and baking times for gluten-free dough.
What Ingredients Are Best For Gluten-free Bread Recipes?
Use gluten-free flours like rice, almond, or sorghum. Add xanthan gum to improve texture and elasticity.
How Long Does Gluten-free Bread Take To Bake?
Baking time varies by recipe and machine. Generally, it takes 60 to 90 minutes with a gluten-free cycle.
Can I Use Regular Yeast For Gluten-free Bread?
Yes, regular yeast works well. Just ensure the dough has enough moisture and proper gluten-free flour blend.
Conclusion
Gluten-free bread can turn out great in a bread maker. Use the right ingredients and settings for best results. Patience matters; the dough may need extra time to rise. Trying different recipes helps find your favorite taste and texture. Baking at home saves money and controls what goes inside.
Enjoy fresh, homemade gluten-free bread anytime you want. It’s easier than many think. Give it a try and see how simple it can be.
