


Have you ever wondered if you can make yogurt right in your food dehydrator? If you love homemade yogurt but don’t have a yogurt maker, this question might be on your mind.
The idea sounds simple and convenient—using a tool you already have to create creamy, fresh yogurt at home. But is it really possible? You’ll discover how your food dehydrator can become an unexpected kitchen helper. Keep reading to find out the easy steps, tips, and tricks that will turn your dehydrator into a yogurt-making machine.
You might be surprised at how simple and rewarding it is!
Benefits Of Making Yogurt At Home
Making yogurt at home has many benefits. It is simple, healthy, and saves money. You control what goes into your yogurt. No strange additives or preservatives. It tastes fresh and natural. Home-made yogurt can fit your taste perfectly. Using a food dehydrator makes this process easy and fun.
Health Advantages
Homemade yogurt is rich in probiotics. These good bacteria help your digestion. It boosts your immune system naturally. You avoid added sugars and artificial flavors. Homemade yogurt is fresher and more nutritious. It supports a healthy gut and overall wellness.
Cost Savings
Making yogurt at home costs less than buying it. A small amount of milk and starter culture is enough. You save money by avoiding store prices. Homemade yogurt lasts longer and reduces waste. It is a budget-friendly way to enjoy fresh yogurt daily.
Customizing Flavors
Home yogurt lets you choose flavors easily. Add fruits, honey, or nuts to your taste. Control the sweetness and thickness of your yogurt. Experiment with different milk types for unique tastes. Create your perfect yogurt every time with no limits.

Why Use A Food Dehydrator For Yogurt
Making yogurt at home needs steady warmth and care. A food dehydrator can help create the perfect setting for yogurt to grow. It keeps the milk at the right warmth, helping good bacteria turn milk into creamy yogurt. Using a food dehydrator makes the yogurt-making process easier and more reliable.
Temperature Control
Yogurt needs a steady temperature to set well. A food dehydrator keeps the heat just right. It avoids sudden changes in temperature. This steady heat helps the yogurt culture grow strong and healthy. Too hot or too cold can spoil the yogurt. A dehydrator offers a gentle and steady warmth.
Even Heat Distribution
A food dehydrator spreads heat evenly across all jars. This stops hot or cold spots in the yogurt. Even heat makes sure every part of the yogurt sets the same. No patches of liquid or overcooked yogurt. It creates smooth and consistent results every time.
Energy Efficiency
Food dehydrators use less power than ovens or stovetops. They keep a low, steady heat without wasting energy. This saves money on your electric bill. A dehydrator runs quietly and uses energy in a smart way. It is a simple tool for yogurt without extra cost or fuss.
Ingredients Needed
Simple ingredients are needed to make yogurt in a food dehydrator: milk and yogurt starter. Use plain milk and a small amount of live-culture yogurt. These basics help turn milk into creamy yogurt with gentle heat.
Milk Options
Milk is the base for making yogurt in a food dehydrator. You can use whole milk for creamier yogurt. Low-fat or skim milk works too, but the yogurt will be thinner. Non-dairy options like almond or coconut milk are possible, but they need extra thickening agents. Fresh milk gives the best taste and texture. Avoid ultra-pasteurized milk because it may not set well.
Starter Cultures
Starter cultures are live bacteria that turn milk into yogurt. You can use plain yogurt with live active cultures as a starter. Look for labels that say “live and active cultures.” Powdered yogurt starter cultures are another option. They ensure consistent results and longer shelf life. The starter must be fresh and not expired for good fermentation.
Step-by-step Yogurt Making Process
Making yogurt at home can be simple and fun. Using a food dehydrator helps control the temperature well. Follow these easy steps to make creamy yogurt.
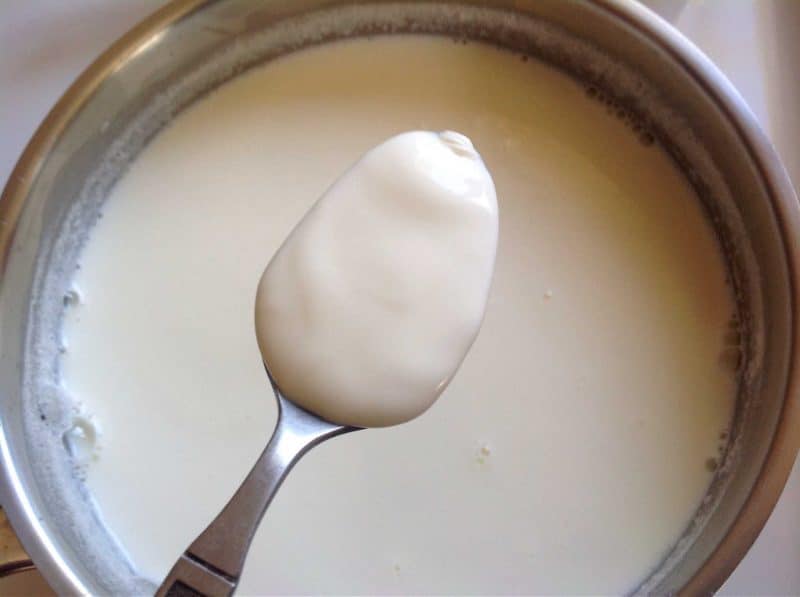
Preparing The Milk
Start with fresh milk. Pour it into a pot and heat gently. Heat until it reaches about 180°F (82°C). This kills unwanted bacteria and changes the milk proteins. Let the milk cool to around 110°F (43°C). This is the perfect temperature for adding the starter.
Adding The Starter
Use plain yogurt with live cultures as your starter. Mix a small amount of the starter into the warm milk. Stir gently but well. This spreads the good bacteria evenly in the milk.
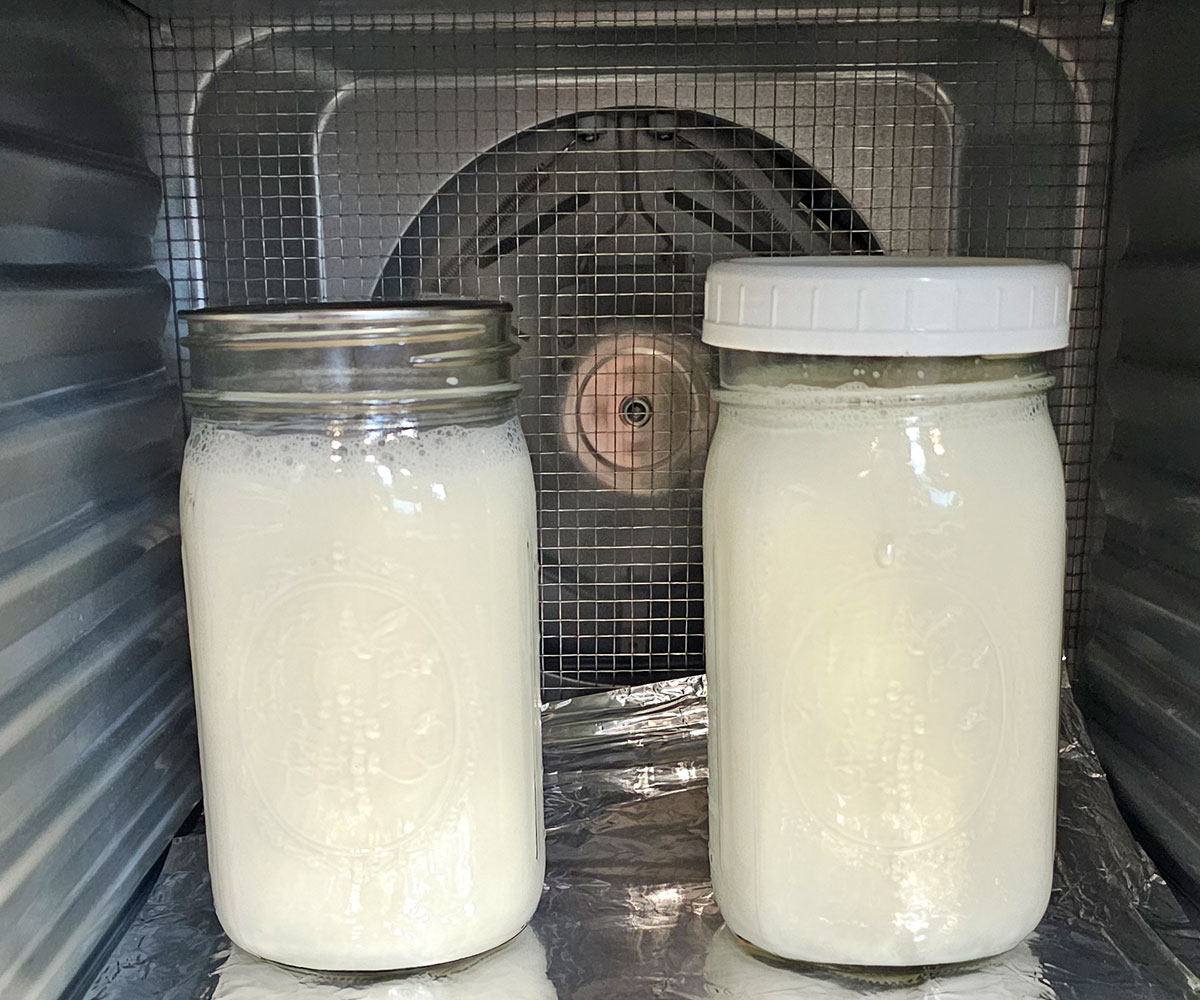
Setting Up The Dehydrator
Place the mixed milk in small jars or containers. Put the jars inside the food dehydrator. Set the temperature to about 110°F (43°C). This warm setting helps the bacteria grow and turn milk into yogurt.
Incubation Time
Let the jars sit in the dehydrator for 6 to 12 hours. The longer time gives thicker and tangier yogurt. Check after 6 hours. If it is not set, leave it longer. Once ready, cool the yogurt in the fridge before eating.
Tips For Perfect Texture And Taste
Making yogurt in a food dehydrator can be simple and rewarding. Getting the texture and taste right takes some care. Small steps make a big difference in your homemade yogurt. Follow these tips to enjoy creamy, delicious results every time.
Choosing The Right Milk
Milk quality affects yogurt texture and flavor. Whole milk creates creamier yogurt. Low-fat milk results in thinner yogurt. Fresh milk gives better taste. Avoid ultra-pasteurized milk; it may not set well. Organic milk often has richer flavor.
Maintaining Consistent Temperature
Yogurt cultures need steady warmth to grow. Keep the temperature between 110°F and 115°F. Use a thermometer to check regularly. Too hot kills good bacteria. Too cold slows fermentation. The food dehydrator must hold the heat steady for 6 to 8 hours.
Avoiding Contamination
Cleanliness is key for safe yogurt. Wash all containers and spoons with hot water. Use sterilized jars to prevent bad bacteria. Avoid touching the inside of jars or lids. Keep the yogurt covered during incubation. This stops dust and germs from spoiling your batch.
Troubleshooting Common Issues
Making yogurt in a food dehydrator is simple but can have some common problems. These issues can stop your yogurt from turning out right. Knowing how to fix them helps you enjoy smooth, tasty yogurt every time. Below are solutions to common problems like yogurt not setting, grainy texture, and off flavors.
Yogurt Not Setting
Yogurt may not set if the temperature is too low. The ideal range is 110°F to 115°F. Check your food dehydrator’s thermostat. Use a thermometer to be sure. Also, fresh starter culture is important. Old or weak cultures might fail. Stir the starter well into warm milk. Avoid overheating milk, as it kills good bacteria.
Grainy Texture
A grainy texture happens when the yogurt curdles. Stirring too much during incubation can cause this. Use whole milk for creamier yogurt. Low-fat milk often leads to graininess. Let the yogurt rest undisturbed in the dehydrator. Adding a little milk powder can improve thickness and smoothness.
Off Flavors
Off flavors come from poor hygiene or old ingredients. Clean all tools and jars before use. Use fresh milk and starter culture. Avoid metal containers; glass or plastic is better. Over-fermentation also causes sour or bitter taste. Check your timing and stop incubation once yogurt sets. Store yogurt in the fridge to keep flavors fresh.
Storing And Using Homemade Yogurt
Making yogurt in a food dehydrator is fun and easy. After you finish, knowing how to store and use your homemade yogurt keeps it fresh and tasty. Proper storage helps keep good bacteria alive and stops spoilage. Using your yogurt in recipes adds variety to your meals.
Refrigeration Tips
Store yogurt in clean, airtight containers. Keep it in the coldest part of your fridge. Avoid leaving yogurt out at room temperature for long. Always use a clean spoon to scoop yogurt. This stops germs from spoiling your batch.
Shelf Life
Homemade yogurt lasts about 1 to 2 weeks in the fridge. Check for sour smell or mold before eating. If you see any, throw it away. Trust your senses to decide if yogurt is good to eat.
Creative Recipes
Use yogurt as a base for smoothies with fruit. Mix it with honey and nuts for a healthy snack. Try it in salad dressings to add creaminess. Yogurt can also replace sour cream in many dishes.
Frequently Asked Questions
Can A Food Dehydrator Ferment Yogurt Properly?
Yes, a food dehydrator can ferment yogurt by providing steady warmth. Keep the temperature around 110°F for 6-12 hours. This environment promotes bacterial growth, turning milk into yogurt effectively.
What Temperature Is Ideal For Yogurt In A Dehydrator?
Maintain a consistent temperature of about 110°F (43°C). This warmth helps the yogurt culture develop properly. Avoid temperatures above 115°F to prevent killing beneficial bacteria.
How Long Does Yogurt Take To Set In A Dehydrator?
Yogurt usually takes 6 to 12 hours to set. The time depends on temperature and desired thickness. Check periodically to avoid over-fermentation or sour taste.
Is Homemade Yogurt In A Dehydrator Safe To Eat?
Yes, homemade yogurt from a dehydrator is safe if hygienic practices are followed. Use fresh milk and clean containers. Proper fermentation inhibits harmful bacteria growth.
Conclusion
Making yogurt in a food dehydrator is possible but not ideal. The temperature control may not be steady enough for good fermentation. Using a yogurt maker or an oven with a low setting works better. Still, the dehydrator can help keep your yogurt warm for a short time.
Experiment carefully and watch the temperature closely. Homemade yogurt can be tasty and healthy with the right tools. Try different methods to find what suits you best. Enjoy the process and the creamy results!
