


Are you craving delicious crepes but need to avoid gluten? You don’t have to miss out anymore.
Making gluten-free crepes at home is easier than you think—especially with a crepe maker by your side. Imagine flipping perfectly thin, soft, and tasty crepes in minutes, all without worrying about gluten. In this guide, you’ll discover simple steps and insider tips to master gluten-free crepes that will impress your family and friends.
Ready to transform your kitchen into a crepe haven? Let’s get started!
Choosing The Right Gluten-free Flour
Choosing the right gluten-free flour is key to making perfect crepes on a crepe maker. Different flours affect the taste, texture, and flexibility of the crepes. Some flours make the batter too thick, while others can make it crumbly. Understanding which flour to use helps create soft, thin, and tasty crepes. Experimenting with flours can lead to the best results for your gluten-free recipe.
Popular Gluten-free Flours
Rice flour is a common choice for gluten-free crepes. It has a mild flavor and smooth texture. Almond flour adds a nutty taste and makes crepes moist. Coconut flour is very absorbent, so use it in small amounts. Oat flour gives a slightly sweet flavor and good structure. Each flour offers a unique taste and feel to crepes.
Mixing Flours For Best Texture
Mixing different gluten-free flours can improve crepe texture. Combining rice flour with almond or oat flour balances taste and softness. Adding a little tapioca starch helps make crepes stretchier. A blend prevents crumbling and keeps crepes thin. Try small batches to find your favorite mix for tender, flexible crepes.
Essential Ingredients For Crepes
Making gluten-free crepes needs the right ingredients. These ingredients help create thin, soft, and tasty crepes. Without them, crepes can turn out dry or break easily. Understanding the essential ingredients improves your cooking results.
Wet Ingredients To Use
Wet ingredients give crepes their smooth texture. Eggs add moisture and flavor. Milk or plant-based milk thins the batter. Water can replace some milk to lighten the batter. Melted butter or oil adds richness and helps crepes cook evenly. These ingredients mix well to make the batter easy to spread.
Binding Agents And Their Role
Binding agents hold gluten-free crepes together. They replace gluten’s role in regular crepes. Common binders include xanthan gum, psyllium husk, or flaxseed meal. These help the batter stick and prevent crumbling. Using the right binder creates flexible and soft crepes. Without them, crepes may break or fall apart.
Preparing The Batter
Preparing the batter is the first step to making delicious gluten-free crepes. The batter must be smooth and well-mixed. It needs the right texture to spread easily on the crepe maker. Careful preparation helps create thin, soft crepes that do not break.
Mixing Techniques
Start by whisking the dry ingredients together. Use a bowl to combine gluten-free flour, sugar, and salt. In another bowl, beat the eggs and milk. Slowly pour the wet mix into the dry mix. Stir gently to avoid lumps. Use a whisk or hand mixer for a smooth blend. Mix until the batter looks even and smooth.
Achieving The Perfect Consistency
The batter should be thin but not watery. It must flow easily from a spoon. If it is too thick, add a little more milk. If too thin, sprinkle a bit of flour. The right consistency spreads quickly on the crepe maker. It forms a thin, even layer that cooks well.
Resting The Batter
Let the batter rest for 20 to 30 minutes. Resting helps the flour absorb the liquid. It also lets the bubbles disappear. This step makes the crepes soft and tender. Cover the bowl with a cloth or plastic wrap. Resting improves the batter’s texture and taste.

Setting Up The Crepe Maker
Setting up the crepe maker correctly is key to making perfect gluten-free crepes. Proper setup helps the batter cook evenly and prevents sticking. It also saves time and effort during cooking.
Follow simple steps to prepare your crepe maker for the best results. Start by adjusting the temperature and applying the right amount of grease. These small actions improve the texture and taste of your crepes.
Temperature Settings
Set the crepe maker to medium heat. Too hot, and the batter burns fast. Too low, and the crepe cooks unevenly. Medium heat ensures a golden, soft crepe.
Wait a few minutes for the surface to reach the set temperature. Use a small drop of batter to test. It should cook quickly but not burn.
Greasing Tips
Lightly grease the crepe maker before cooking. Use a paper towel to spread a thin layer of oil or butter. Avoid heavy greasing, which makes crepes greasy and uneven.
Re-grease only if crepes start sticking. This keeps the surface smooth and easy for flipping. Use oils with neutral flavor to keep the crepes tasty.
Cooking Gluten-free Crepes
Cooking gluten-free crepes on a crepe maker is simple with the right steps. The batter spreads thin and cooks quickly. Controlling heat and timing helps make soft, flexible crepes without cracks. Careful handling keeps the crepes smooth and intact for folding or rolling.
Pouring And Spreading The Batter
Pour a small amount of batter onto the hot crepe maker. Use a circular motion to spread the batter thin and even. Avoid pouring too much batter at once. The crepe should be almost see-through when spread well. Thin crepes cook faster and have a delicate texture.
Flipping Without Tearing
Wait for the edges to lift slightly before flipping. Use a thin spatula to gently loosen the edges. Slide the spatula under the crepe carefully. Flip the crepe in one smooth motion. Handle it gently to avoid tearing or breaking the crepe.
Timing For Perfect Doneness
Cook the first side about 1 to 2 minutes. Look for light golden spots and dry edges. Flip and cook the second side for 30 to 60 seconds. The crepe should feel soft and flexible, not stiff or dry. Remove from heat and stack on a plate with parchment paper.
Creative Filling Ideas
Creative filling ideas make gluten-free crepes exciting and tasty. Fillings can change the flavor and mood of your crepe. Sweet or savory, each option offers a unique experience. Experimenting with different fillings keeps your meals fresh and fun.
Sweet Options
Spread some classic Nutella or chocolate spread for a rich taste. Use fresh fruits like strawberries, bananas, or blueberries to add natural sweetness. A dollop of whipped cream or yogurt makes the crepe creamy and light. Try honey or maple syrup for a simple, sweet touch. Cinnamon and sugar mix gives a warm, cozy flavor. You can also add nuts for a crunchy texture.
Savory Options
Fill your crepes with cheese and ham for a simple meal. Sautéed mushrooms and spinach create a healthy and tasty option. Add scrambled eggs and herbs for a protein-rich choice. Avocado slices and smoked salmon bring a fresh, rich flavor. Use grilled vegetables with a drizzle of olive oil for a light filling. A touch of pesto or tomato sauce can add a burst of flavor.
Serving And Storing Tips
Serving and storing gluten-free crepes properly helps keep them fresh and tasty. You want to enjoy their soft texture and rich flavor every time. Knowing how to present and store crepes can make your meal more enjoyable and reduce waste.
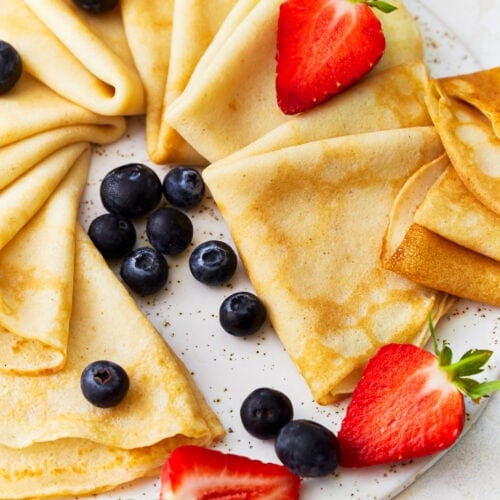
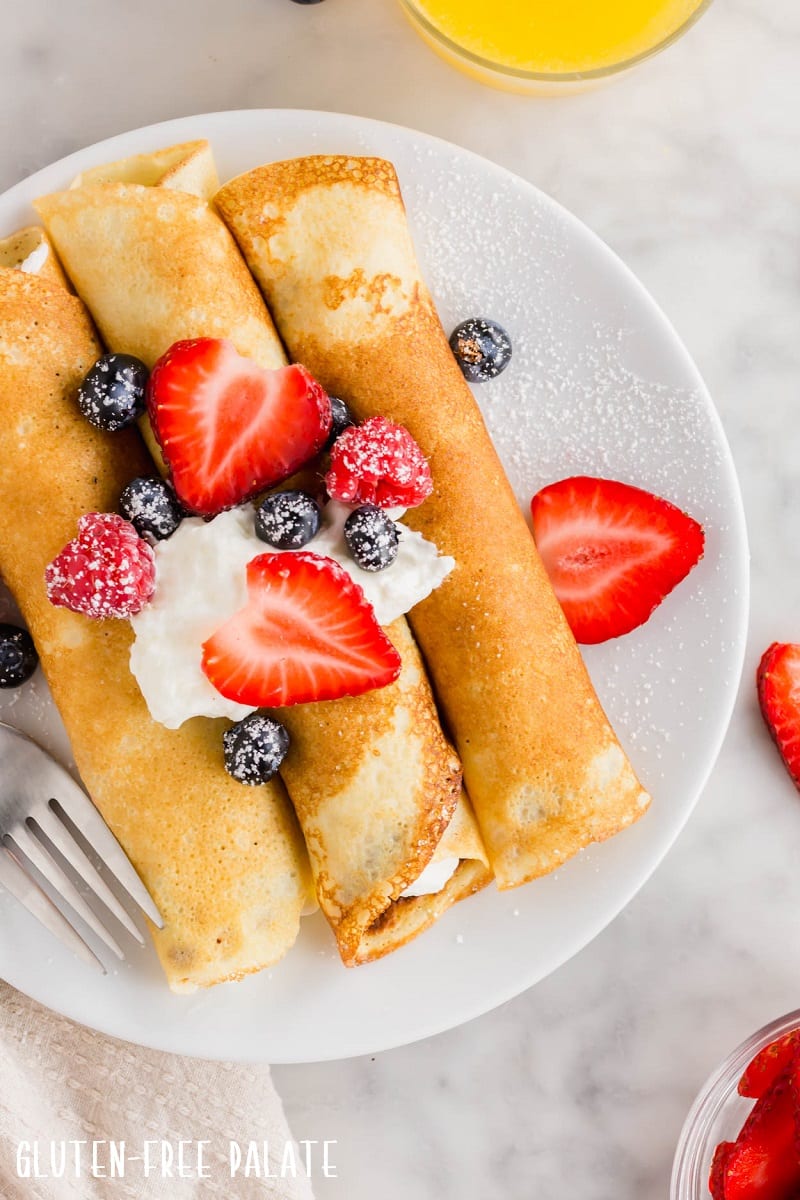
Presentation Suggestions
Arrange crepes on a warm plate for a nice touch. Fold them into triangles or roll them with fillings inside. Use fresh fruits like berries or sliced bananas for color. A dusting of powdered sugar adds a sweet look. Drizzle honey or maple syrup for extra flavor. Serve with a small bowl of yogurt or whipped cream on the side.
Storing Leftover Crepes
Let crepes cool completely before storing. Stack them with parchment paper between each crepe. Place the stack in an airtight container or wrap tightly with plastic wrap. Store in the fridge for up to two days. For longer storage, freeze crepes in a sealed bag. Thaw in the fridge or at room temperature before reheating gently.
Troubleshooting Common Issues
Making gluten-free crepes on a crepe maker can be fun but tricky. Some common problems may slow you down or spoil your crepes. Understanding these issues helps you fix them fast. This way, you enjoy perfect, soft crepes every time.
Batter Too Thick Or Thin
Batter that is too thick makes crepes heavy and hard to spread. Add a little more milk or water to thin it out. Batter that is too thin spreads too fast and breaks easily. Add a bit more gluten-free flour to thicken it. Aim for a smooth, pourable batter that flows slowly off the spoon.
Crepes Sticking To The Maker
Crepes stick when the crepe maker is not hot enough or not greased well. Preheat the maker fully before pouring the batter. Lightly brush the surface with oil or butter to prevent sticking. Avoid using too much oil; it can cause uneven cooking. Use a thin, even layer for best results.
Tearing Or Crumbling Crepes
Tearing happens if crepes dry out or cook too long. Cook each crepe just until edges lift and the surface looks set. Gently loosen edges with a spatula before flipping. Crumbling crepes often mean the batter lacks enough moisture or fat. Add an extra egg or a tablespoon of oil to improve texture.
Frequently Asked Questions
How Do I Make Gluten-free Crepes On A Crepe Maker?
To make gluten-free crepes, mix gluten-free flour, eggs, milk, and a pinch of salt. Preheat the crepe maker, pour batter, and spread evenly. Cook each side for 1-2 minutes until golden brown. Use non-stick spray for easy flipping.
What Is The Best Gluten-free Flour For Crepes?
A blend of rice flour, tapioca starch, and potato starch works best. This mix creates a smooth, flexible batter. It prevents cracking and adds a light texture to gluten-free crepes. Avoid single flours for better results.
Can I Use Regular Crepe Recipes For Gluten-free Crepes?
Regular recipes need adjustments for gluten-free flour absorption. Increase liquid slightly and add a binding agent like xanthan gum. This improves batter consistency and crepe texture. Always test small batches to perfect your gluten-free crepe recipe.
How Do I Prevent Gluten-free Crepes From Sticking?
Preheat your crepe maker properly before cooking. Lightly grease the surface with oil or non-stick spray. Use a non-stick crepe maker if possible. Pour batter evenly and flip gently to avoid tearing.
Conclusion
Making gluten-free crepes on a crepe maker is simple and fun. Use the right flour mix and keep the batter smooth. Heat the crepe maker well before pouring the batter. Cook each crepe until edges lift easily. Fill them with sweet or savory toppings you enjoy.
Practice helps you get thin, perfect crepes every time. Enjoy fresh, gluten-free crepes at home anytime. A tasty treat for everyone to love.
