

Most water heater problems are diagnosable with basic checks and simple fixes.
I’ve worked on dozens of units and written guides for homeowners and techs. This article on Water Heater Troubleshooting explains clear steps, safety tips, and fixes you can try today. I’ll show how to diagnose common faults, perform safe tests, and decide when to call a pro. Read on to learn practical, experience-backed advice that saves time and money.
Common signs your water heater needs troubleshooting
If you notice one or more of these signs, you need Water Heater Troubleshooting now. Early checks often prevent bigger failures.
- No hot water or not enough hot water.
- Water is too hot or fluctuates in temperature.
- Strange noises from the tank.
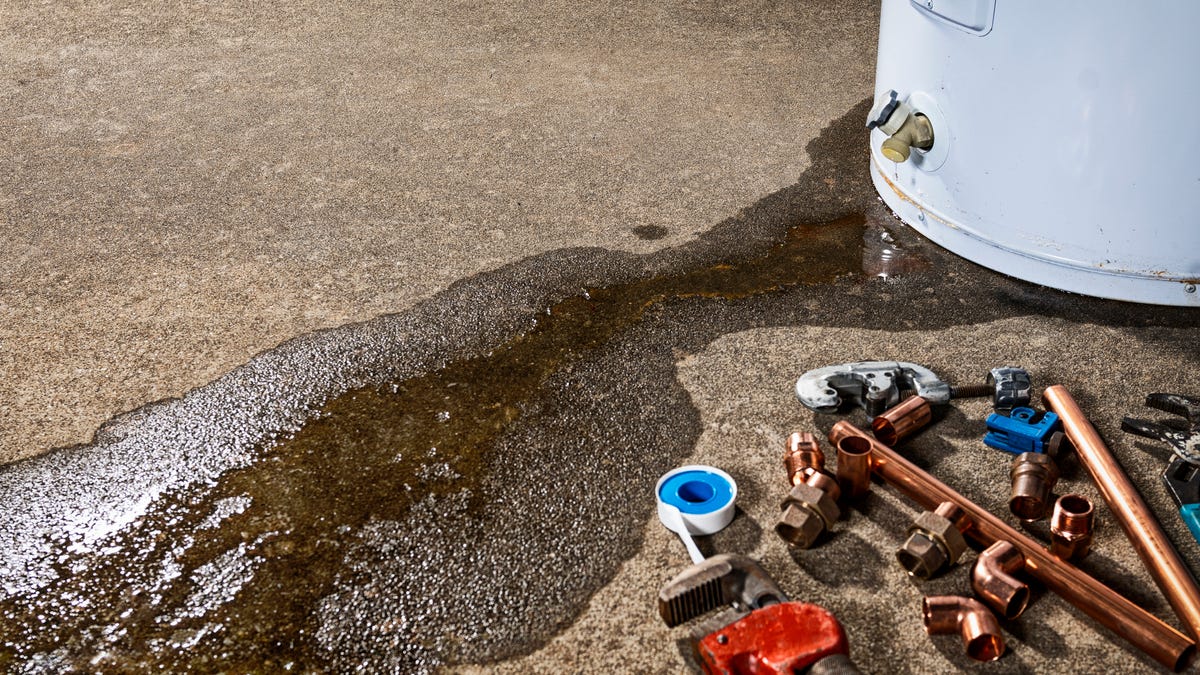
- Leaks around the unit or pool of water on the floor.
- Water looks rusty or has sediment.
- Pilot light goes out often (gas units).
- High energy bills without clear reason.
I once found a homeowner’s "no hot water" call was a tripped breaker. A quick reset fixed it in minutes. Small checks like that save hours. Regular observation helps catch issues early.

How to approach Water Heater Troubleshooting: a step-by-step guide
Follow this clear process when you begin Water Heater Troubleshooting. Stay safe and work methodically.
- Check for power or fuel supply
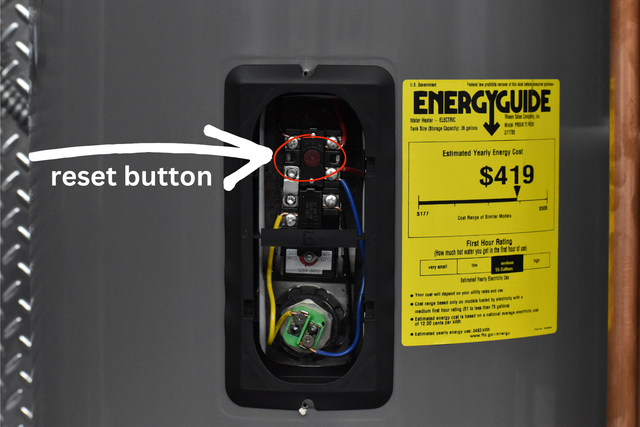
- For electric models, check the circuit breaker and reset if tripped.
- For gas models, confirm the gas valve is open and the pilot is lit.
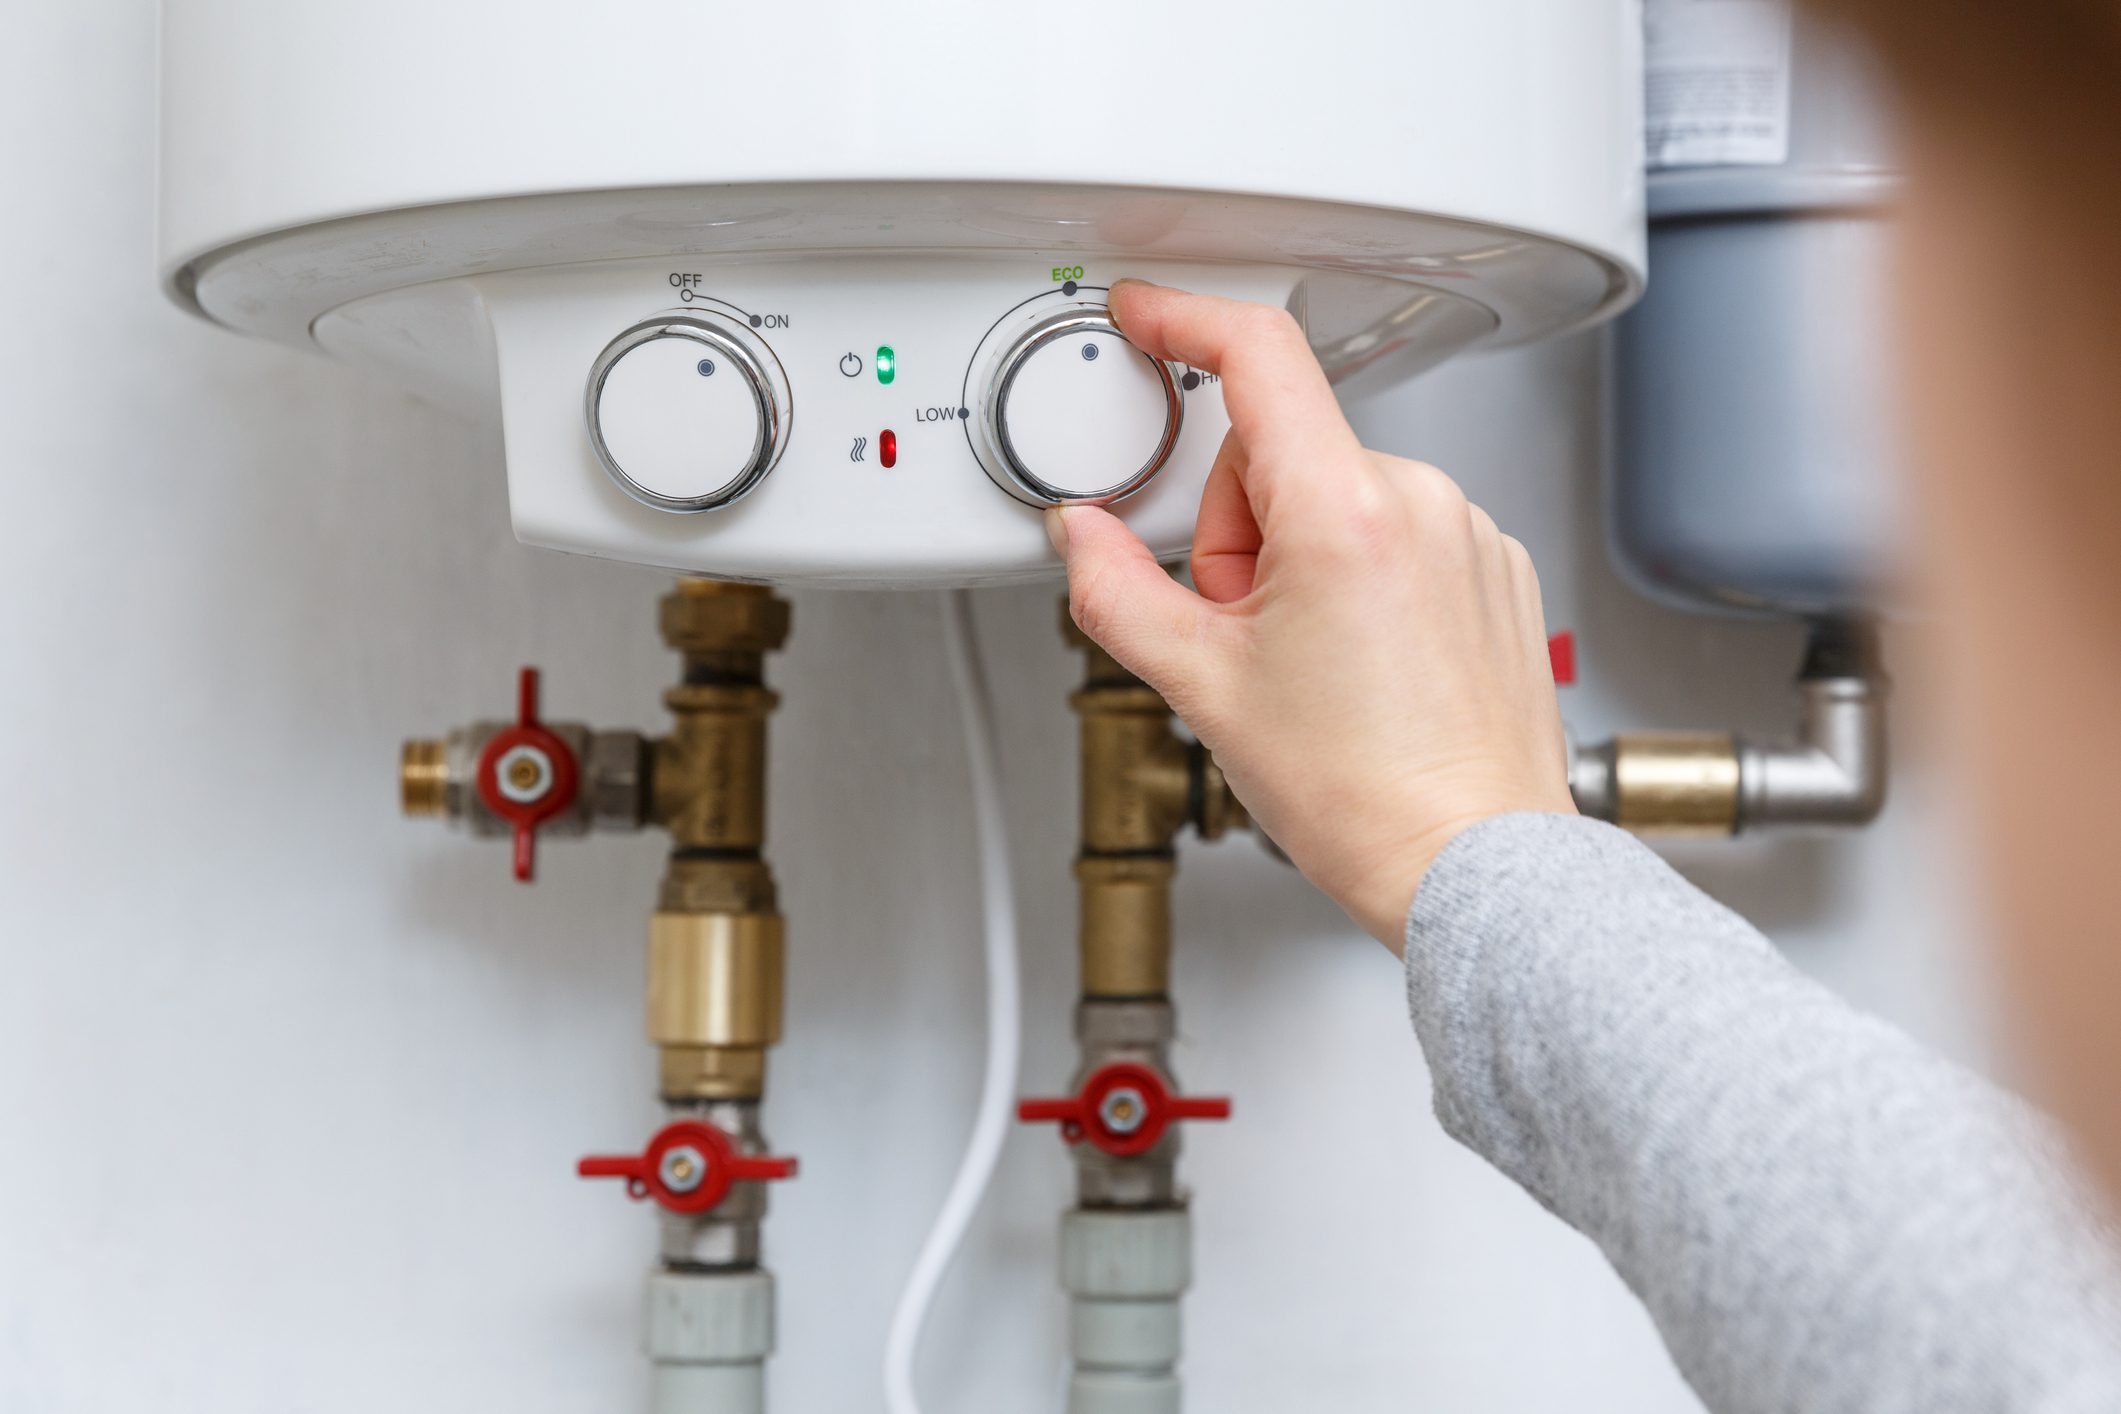
- Test for temperature issues
- Set the thermostat to a safe level (120°F recommended) and wait 30 minutes.
- Measure outlet water temperature with a thermometer.
- Inspect for leaks and corrosion
- Look for wet spots at fittings, valves, and the tank base.
- Check the temperature and pressure (T&P) relief valve for drips.
- Listen and smell
- Pop or rumble sounds indicate sediment.
- A rotten-egg smell usually points to bacterial growth in the tank.
- Check for hot water capacity problems
- Older tanks may lose capacity due to scale build-up or failing dip tubes.
- Perform simple resets and minor repairs
- Reset the high-limit switch on electric units after turning power off then on.
- Relight pilot on gas models per manufacturer steps.
Work slowly. If any step feels risky, stop and call a pro. I keep a simple checklist that I use on every service call. It saves time and helps me avoid missed items.
Fixes by water heater type
Different units need different fixes. Here are practical tips for tank, tankless, electric, and gas models.
Electric tank heaters
- Reset the breaker and the high-limit switch.
- Test heating elements with a multimeter and replace if open.
- Flush the tank to remove sediment that reduces efficiency.
Gas tank heaters
- Relight or repair the pilot assembly.
- Clean or replace the thermocouple if the pilot won’t stay lit.
- Check the gas pressure and venting for blockages.
Tankless water heaters
- Flush the heat exchanger if flow rate drops.
- Clean inlet filters and screen to restore flow.
- Confirm correct gas type and line sizing for gas tankless units.
Hybrid and heat-pump water heaters
- Check refrigerant systems and ensure proper airflow.
- Verify defrost cycle and electrical connections.
I once flushed a tankless unit that a homeowner said was unreliable. It ran like new after removing scale. Regular maintenance is the best prevention.
Tools and tests you’ll need
These basic tools make Water Heater Troubleshooting safer and faster.
- Digital thermometer for measuring outlet water temperature.
- Multimeter for electrical tests.
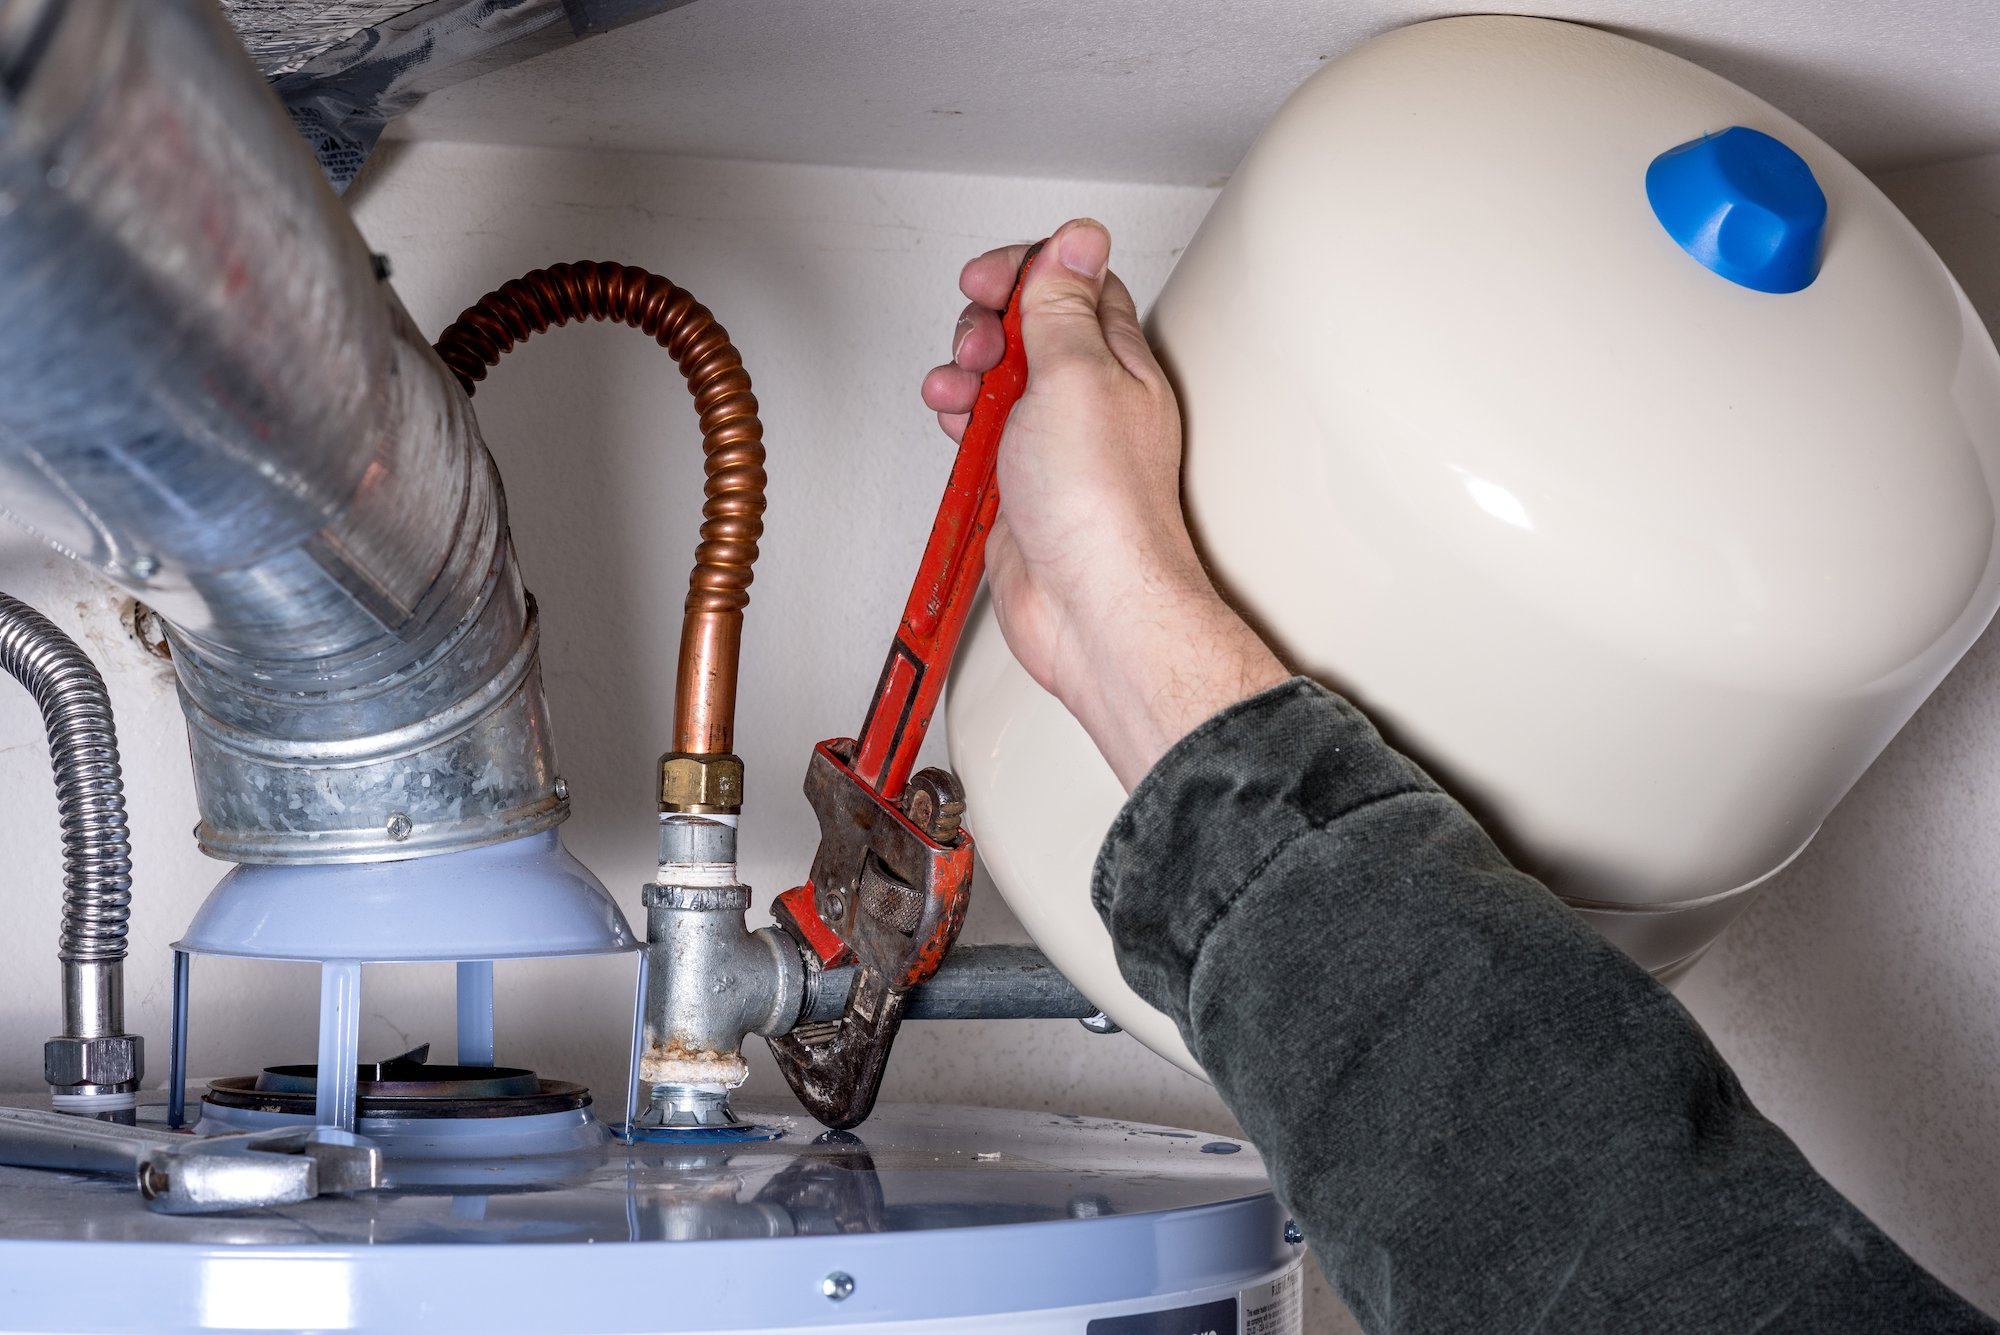
- Adjustable wrench set for fittings and valves.
- Garden hose for tank flushing.
- Bucket and rags for holding water and cleanup.
- Screwdrivers and flashlight for inspections.
Safety gear is also important. Wear gloves and eye protection. Treat hot water and gas with respect.

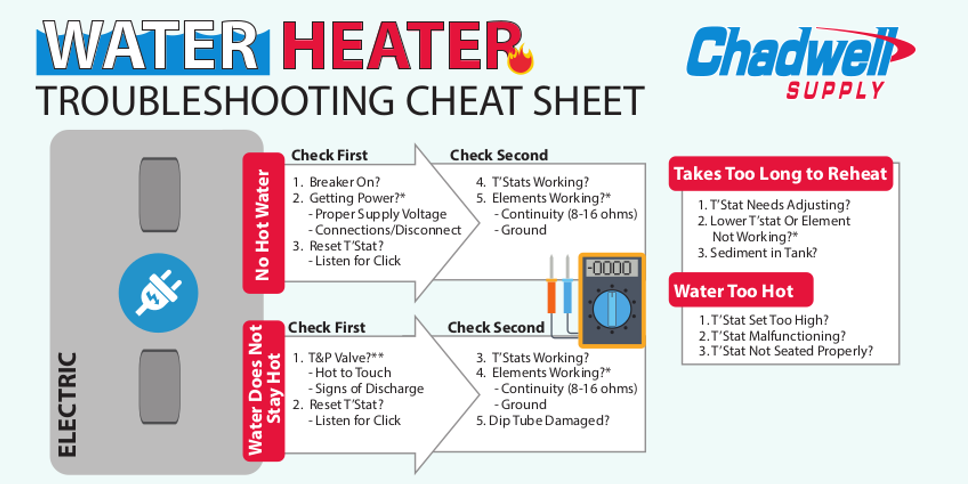
Common problems, causes, and quick solutions
Below are typical problems you’ll see during Water Heater Troubleshooting and practical fixes.
No hot water
- Causes: Tripped breaker, faulty element, gas supply issue, or pilot out.
- Fix: Check power, test elements, relight pilot or call a gas tech.
Not enough hot water
- Causes: Wrong thermostat setting, sediment, undersized unit, failed dip tube.
- Fix: Raise temperature slightly, flush tank, or replace dip tube.
Water too hot or fluctuating
- Causes: Faulty thermostat or mixing valve.
- Fix: Test and replace thermostat, install or adjust mixing valve to 120°F.
Strange noises (popping, rumbling)
- Causes: Sediment build-up on the tank bottom causing steam pockets.
- Fix: Flush the tank and consider a water softener if scale is heavy.
Rusty or dirty water
- Causes: Corroded anode rod or internal rust.
- Fix: Replace the anode rod; if the tank is leaking rust, plan for replacement.
Leaks
- Causes: Loose fittings, valve failure, or tank corrosion.
- Fix: Tighten fittings, replace valves, or replace tank if corroded.
Smell like rotten eggs
- Causes: Bacteria reacting with magnesium anode in well water.
- Fix: Shock the tank with chlorine following safe procedures and replace the anode with a zinc-aluminum unit.
I once saw a tank with loud popping. After flushing, the noise stopped and efficiency improved. Preventive flushing every year or two can extend tank life.
Maintenance routines that prevent most issues
A little care prevents trips and costly repairs. Use these maintenance steps regularly.
- Flush the tank annually to remove sediment.
- Check the T&P relief valve once a year for proper discharge.
- Inspect and replace the anode rod every 3–5 years if consumed.
- Test the thermostat and reset switches annually.
- Keep the area around the heater clear and ventilated.
- For tankless units, flush and descale every 6–12 months depending on water hardness.
I add these items to a yearly home maintenance list. Doing them early avoids emergency calls in winter.
When to call a professional
Some problems are DIY-friendly. Others need a trained tech. Call a pro if you see any of these:
- Active leak from the tank body or seams.
- Gas smell that won’t clear after ventilation.
- Repeated pilot outages on gas units.
- Electrical faults that trip breakers repeatedly after resets.
- Complex component failures or warranty-covered parts.
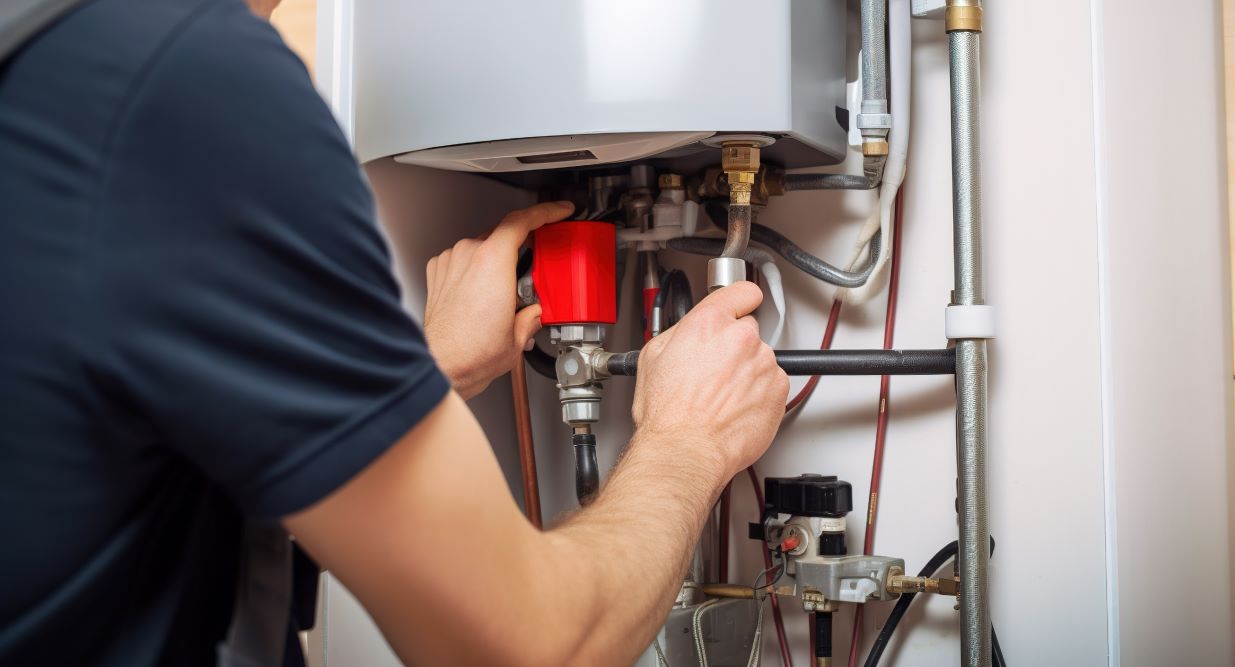
A licensed professional can handle gas valves, replace tanks, and test pressure safely. For safety and code compliance, hire a pro for gas and major electrical repairs.
Parts, costs, and replacement planning
Knowing likely costs helps you plan. These are ballpark figures and vary by location and model.
- Heating element replacement: low cost, often DIY-friendly.
- Thermostat replacement: low to moderate cost.
- Anode rod replacement: low cost; good DIY job.
- T&P valve replacement: low to moderate cost.
- Tank replacement: moderate to high cost depending on size and labor.
- Tankless unit replacement: high cost, but higher long-term efficiency.
If your water heater is older than 10–15 years, plan for replacement. New units are more efficient and often save money over time.
Safety precautions for DIY troubleshooting
Safety matters. Follow these rules during Water Heater Troubleshooting:
- Turn off power for electric units before opening covers.
- Shut off gas supply and vent the area for gas repairs.
- Allow the tank to cool before draining.
- Use proper tools and protective gear.
- Avoid welding or soldering near gas lines unless done by a pro.
When in doubt, stop and call a licensed technician. Safety first keeps you and your home safe.
Personal lessons and common mistakes to avoid
From years of service work, here are lessons I teach new homeowners.
- Don’t ignore small leaks. They grow fast.
- Avoid setting temperature very high; scald risks rise and scale forms faster.
- Don’t bypass safety devices like the T&P valve.
- Keep records of service dates and parts replaced.
- Test simple fixes first—often it’s a breaker or pilot light.
I once replaced a tank that a homeowner delayed for months. The small leak became a major failure. Timely action prevents emergencies.
Related concepts and further learning
Understanding related topics helps with diagnosis and longevity.
- Water hardness and scale control
- Energy efficiency ratings and standby loss
- Local codes for venting and gas lines
- Difference between storage and on-demand heating
Learning these helps you choose the right unit and maintenance plan.
Frequently Asked Questions of Water Heater Troubleshooting
Why is my water heater not producing hot water?
Check power and fuel first. For electric units, inspect the breaker and elements; for gas units, confirm the pilot and gas supply.
How often should I flush my water heater?
Flush a tank-style heater once a year. Tankless units need descaling every 6–12 months depending on water hardness.
Can I relight the pilot myself?
Yes, many gas units have a relight procedure on the unit label, but if you smell gas or the pilot won’t stay lit, call a pro.
When does a water heater need full replacement?
Replace when the tank leaks, the cost to repair exceeds replacement cost, or the unit is near the end of its 10–15 year life span.
Is a noisy water heater dangerous?
Noisy tanks are usually a sign of sediment build-up. It’s not immediately dangerous, but it reduces efficiency and can lead to damage if untreated.
How do I know if the thermostat is bad?
If water is too hot or never reaches set temperature, the thermostat may be faulty. Test it or swap with a known good thermostat for confirmation.
Can I fix a leaking T&P valve?
Sometimes. If the valve drips, try lifting it to clear debris. Replace it if it continues to leak or fails to seal.
Final thoughts and next steps
Water Heater Troubleshooting starts with simple checks, safe tests, and timely maintenance. Address small issues early, follow safety rules, and plan for replacement when the unit nears its lifespan. Take action now: check your breaker, inspect for leaks, and schedule a flush if you haven’t had one in a year. Share your questions below or subscribe for more hands-on home maintenance tips.
